The Video Wall Guide: How To Set Up A Multi-Screen Display
Video walls add excitement and a “WOW” factor to any space, whether it’s in your corporate office or retail location. Setting up a video wall can be a tricky task, but we’ve simplified it for you at Enplug. We’ve created a Step-By-Step guide to help you create your perfect multi-screen display and ensure you’re able to easily keep the content fresh and engaging.

There are two types of video walls you can have. The first type is if you want all of the screens in the wall to show one big image or video. The second type of video wall is if you want each screen to show different content. We’re going to walk you through each type, so you can choose which one best suits the message you want to display and the customers you are targeting. Learn how to set up a video wall today.
Display Visual Communications On Any Screen
First and foremost, let’s take a look at why you might want to use a video wall in the first place. It’s not just about connecting all the screens on your video wall, but in fact, about connecting all the screens in your office. Multi-screen advertising allows you to reach more customers than ever before and spread your marketing message.
From employees to customers, you can streamline processes, share waiting times and open the lines of communications with your customers. It’s the perfect form of marketing for your business and it requires very little effort on your part.
The Enplug software is so intuitive and easy to use, you will be updating your screens like a pro in no time. Want to switch between the two types or video walls? Easy! Want to update your marketing message? Done. Want to keep your customers informed? Go for it. There are so many benefits that come with being able to display visual communications on any screen, so let’s dive into it. Set it up today with these easy steps.
Solution 1: Show one big image or video across the wall

YouTube uses Enplug to power a 6×6 multi screen video wall in its lobby.
The first type of video wall we’ll walk you through on setting up is where you want one seamless image or video to show across the entire display area. For example, you might want to set up a big outdoor advertising screen to advertise a latest event or something exciting happening in your business.
Step 1. Determine your display dimensions
The first step is to determine how many displays you want in your video walls. There are two configuration options:
Configuration #1. Equal number of rows and columns
This setup includes combinations like 2 screens by 2 screens (2×2), 3 screens by 3 screens (3×3), or 5 screens by 5 screens (5×5). Basically, it’s any setup where the number of screens in the rows and columns are the same.

Configuration #2. Different numbers of rows and columns
This setup includes combinations like 1 screen by 4 screens (1×4), 3 screens by 4 screens (3×4), and 5 screens by 6 screens (5×6). It’s any multi-screen setup where the number screens in the rows and columns are different.

Step 2. Get a video wall controller
Next, you’ll need to purchase a video wall controller. This is where you learn how to control a video wall. You can find them on sites like Amazon and B&H Photo Video. So, what is a video wall controller? You’ll connect the controller to each of your displays via an HDMI cable. Make sure your controller is equipped with enough ports to accommodate the number of screens you have.
There are some screens like the Philips or ViewSonic Commercial TVs that come with video wall capabilities built in. With these TV screens, you don’t need to buy a controller.
Step 3. Add Enplug to show beautiful content on the screens
Last, but not least, you’ll connect an Enplug Device to your video wall to bring it to life with stunning content.
Which Enplug player should you use?
- Enplug Device 4K: Use this device if you are doing Configuration #1 from Step 1.
- Enplug DisplayOS for Windows: If you are doing Configuration #2 from Step 1, use your preferred Windows-based media player and download Enplug’s software onto it.
Solution 2: Show different content on each screen

A 2×2 video wall in the Enplug Los Angeles office.
The second type of video wall is often used to show dashboards, metrics, and other content. These video walls can be used as a command center, showing real-time data from your most important information sources.
How do you set it up? This style is much easier and simpler to set up than Style 1. It only takes 2 steps!
Step 1. Determine your display dimensions
Select how many screens you would like in your display and mount them to the wall.
Step 2. Connect Enplug to the screens
Connect an Enplug Device to each screen via an HDMI cable. In the Enplug Dashboard, you can now easily select which content you want to show on each of your screens.
No video wall controller needed!

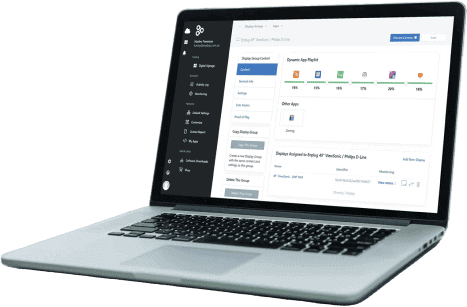
Screenshots of the Enplug Dashboard. Access it online to schedule and change your screen content.
Equipment Summary
Now that you know how to make a video wall, it’s time to dive in and get started. Enjoy the benefits it can have for your business and get in front of as many customers as possible. As a quick reference for what equipment you need for your video wall style, we’ve made this handy chart for you here:

Ready to get started? Sign up for a free trial of Enplug software now.
on August 11, 2019 7:59 pm